Saturday, March 6, 2010

I'm caught up, with a small change.


This is a close up of what I have redone to date.


With the cuff inside out you can see how the contour/taper starts. I began with wide spaced ribs, then came closer. There is one more step of closer ribbing and then I'll widen it up a bit to shape to the hand.

Friday, March 5, 2010

Small post, an update

I've done something just a little different with the contouring, a more gradual taper. I wound up frogging the whole thing again so it is not going as fast as I would like. I am working slower to avoid any further frogging. That's getting old. I am happy with this version so far tho.

I'll try to put up a picture this evening with a description of what I have done so far (again).

Wednesday, March 3, 2010

Spent some time in the frog pond this evening . . .

I over ran the first streight knit section, just finished pulling it apart. It will be a day or two before I have anything else for this blog, I have to catch up with my blog here. I need to recreate up to where the blog is now.
Sorry about the dalay. It's all part of creating a pattern. Trial and error, this was the error part.
Thanks for your patience. Be back soon.
Knancy

Ready to start the contour now


The wide bit of the forarm is finished, I am ready to start to taper smaller. I will try a knit three, purl one section first. (This is the inverse of what I am working as it is worked inside out and then turned to wear or for demo. show.) Then I can take it down further for the narrow bit at the wrist. I really like working with this yarn, I wish it had a label . . .
Oh well, k3, p1 here we go.

Tuesday, March 2, 2010


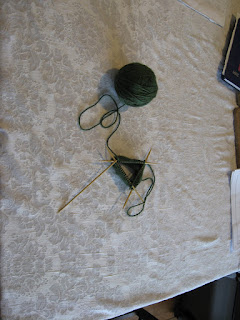
It does not look like much yet but the cast on is complete + a few rows. 16 stitches on each of three needles joined in the round and worked streight knitting, in effect it is purl on the other side. This will be the top of the cuff, near the elbow. The taper will begin about half way to the wrist.

Fingerless gauntlets, long fingerless mitts

I think I'll make another pair of fingerless mitts next. I have been thinking of how to contour them to the forarm, wrist and hand. I've some nice dark sage yarn, another e-bay find again sans label, that I want to get into. This yarn is alot more durable than the exotic yarns I have used recently. The alpacas and angoras are very pretty, and they are great for gifts and things that do not see a lot of wear like hats n scarfs. Mitts and gloves on the other hand, at least mine, get beaten up and ratty looking pretty fast if I use the more fragile exotic yarns.
Heading off now to cast onto my DPNs.

Monday, March 1, 2010

The instructions/pattern for this scarf vest;

Scarf-Vest

~ For this scarf/vest cast on 60 stitches to create a 22 inch wide panel. My yarn was 3 1/2 stitches per inch. My yarn was an acrylic e-bay find with no label.
~ Work in knit stitch until you have a panel 16 inches long. This is the back of the garment, you may choose to make it longer.
~ Work the first 26 stitches of the row and then cast off 8 stitches to begin the neck. Knit the rest of the row. Using two balls of yarn continue to cast off one stitch on either side of the neck with each of the next four rows.
~ On the next row, cast on eight stitches on either side to replace those cast off. Cast eight onto the left row and eight onto the right row. You should now have 30 stitches on each half.
~ Continue to knit both halves at the same time (using two balls of yarn) until the narrower front panels are 22 inches from the back of the neck.
~ Cast off the two front panels.
~ Pick up your cast off neck stitches to graft on your collar. Pick them up; either directly onto the needle, or work a single crochet stitch onto your needle with a crochet hook if the cast off stitches are too tight to work.
~ Add a stitch on either end of the collar using the knit one stitch inside, knit one stitch outside, add on method. Add these extra stitches three stitches in from the end for every row except the last row. Knit the last row forming a 2 1/2 inch collar.
~ Cast off the collar and hand stitch it to the 8 stitch - lapel flap on the front panel. Hand sew; stitch up one inch from the base of the collar to form a notched collar. Weave in any knotted tails.
~ You are now ready to fringe your project. Fringe as you wish, straight or curved, long or short.
~ Wear your Scarf-Vest in good health.